About I2A Chat Service
I2A Chat Service is a simple, lightweight and fully scalable service that allows you to quickly integrate text chatting functionality into your mobile or web app. You'll be able to get your users create conversations (known as "Chat Rooms"), invite other users to join those Chat Rooms and exchange chat messages.
Important caveats:
- I2A Chat Service does NOT have users database, it does not provide any authentication mechanisms. We expect you to have your own users database and authentication back end. I2A Chat Service identifies users by 'user identifiers', generated on your side (by your back end service).
- I2A Chat Service does NOT enforce any permissions related with creating chat rooms, inviting users to join chatrooms, kicking users from chatrooms. It does NOT have any built-in roles such as chatroom owners, admins etc. We allow your back end service to implement all that, any way you want.
Features that I2A Chat Service gives you:
- A simple REST API that allows creating chat rooms, adding or removing users from chat rooms. This API shall be consumed only by your own back end service (never to be called from a client app i.e. your mobile or web app). Requests to the REST API are signed by a secret token, known only to the REST API and your back end service.
- Chat Websocket Server which can automatically scale up to millions of concurrent online users! This is where your client app connects to do the actual chatting stuff. Your client app shall open the websocket using a token obtained from the REST API and then use the socket to send and receive actual chat messages, pull conversation history of given chatroom, mark messages as read or view messages marked as read by others and so on. Note that some performance limitations may apply in some scenarios, such as chat rooms having very large number of online users.
- Offline notifications. This feature is optional. If socket connection drops and user goes offline, they can still receive notifications if other users chat them. It requires you to have a Firebase account. All you'll need is to pass Firebase token (aka fcm_token) associated with user's device on requesting a Websocket session token.
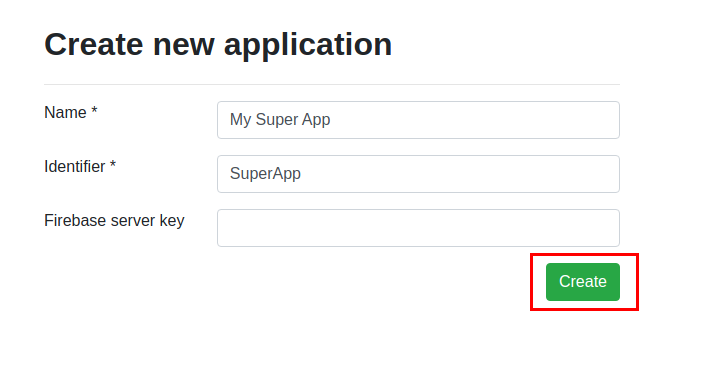
Configure Your Application

Create a Chat Room
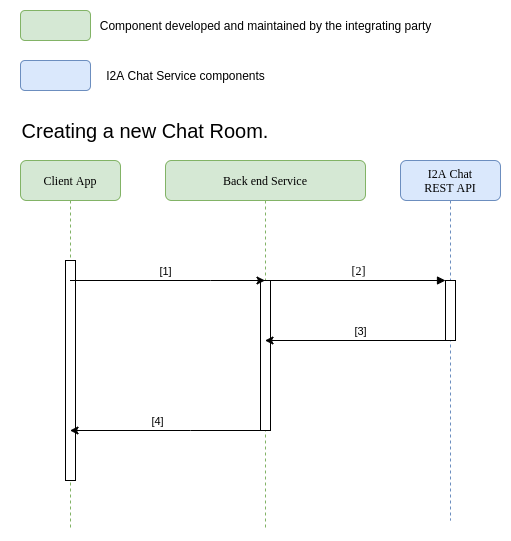
[1] - User in your app makes a call to your back end service, requesting new chat room creation. Your back end handles all authentication and authorization related stuff as well as other business logic that might be required. You have complete freedom on how you want to implement this part of the flow.
[2] - Your back end makes a REST API call POST /server-to-server/v1/chat-room/ (check out the documentation here) You'll need to pass a list of user identifiers that will represent users in this chat room. The API will accept any value here, so it's up to you what you want to use, but generally you should use something that lets your back end identify users (e.g. their DB Primary Key or some unique GUID).
[3] - Your back end gets a JSON response with Chat Room identifier, generated by the I2A REST API. You should now create a chat room record in your database to keep track of this identifier and all users who are in the chat room. It is a very important concept: The source of truth about chat rooms for your app should always be YOUR back end, because this is where user authentication, authorization and other custom business logic stuff is realized. I2A REST API does NOT even allow your back end to list and filter chat rooms, and that's on purpose.
[4] - Your back end passes a success response to the App. The response may include the Chat Room Identifier generated by the I2A Chat REST API.
Connect to the Chat Server

[1] - User in your app makes a call to your back end service, requesting new WebSocket Server Token. Your back end handles all authentication and authorization related stuff as well as other business logic that might be required. You have complete freedom on how you want to implement this part of the flow.
[2] - Your back end makes a REST API call POST /server-to-server/v1/session/open-session/ (check out the documentation here) You'll need to pass a couple of required params: user identifier and device identifier. Both are expected to be generated on your side. User Identifier will typically be Primary Key or other unique ID of your User understood by your back end, while Device ID should be some unique value identifying physical device from which the User is connecting. Optionally, you can pass a JSON with custom data such as user dusplay name, avatar URL and other things the Client App may need to render chat UI later. The last optional parameter is fcm_token (Firebase Token), which is being used for offline notifications (read more about integration with FCM here).
[3] - Your back end service gets a JSON response with a token. The Token will be used by the client app to open a WebSocket with the chat server.
[4] - Your back end sends back the token to the client App.
[5] - The app can now open a WebSocket, passing the Token (either as a header or in URL path). Once the Socket connection is established, the app can send and receive messages over the socket. Check out the Websocket Server documentation for all information on how to connect and exchange messages over the socket. Note, that if the socket connection drops the user is considered offline. If you passed fcm_token in step [1], Chat Websocket Server will send push notifications when somebody writes a message to that user. If you don't integrate fcm_token, offline users won't receive any notifications.